
The IaaS v2 resource providers (Microsoft.Compute, Microsoft.Network & Microsoft.Storage) have been around for several months now and you may have wondered how to use your own custom images for creating virtual machines instead of one offered in the gallery. Let me show you how you can achieve this.
updated on 2015-12-20 to distinguish Azure PowerShell v0.9.x and v1.0.x
Be advised that the experience is not perfect as RPs[1] are is still in preview and improvements will come in waves as the resource providers are reaching GA[2].
In this article series you'll see several ways of capturing your custom VM image. One with ARM Explorer (UI friendly) and the others using Azure PowerShell cmdlets (automation/devops friendly).
Prerequisites
- Microsoft Azure PowerShell <= v0.9.xxx OR Microsoft Azure PowerShell >= v1.0.xxx
- A virtual machine in Azure running Windows Server 2012 or later
Create your Virtual machine
The very first step is to actually create a Windows Server virtual machine from the portal with everything you want on it (I'll be using a Windows Server 2012 R2 VM). If you need help on this, you can check the Create a virtual machine running Windows in the Azure portal link in the Resources section.
Now the part that interest us... Creating a generalized VM image.
Types of VM images
There is two types of virtual machine images, Generalized and Specialized, each serving their own purpose. Here is a good explanation from Christine Avanessians, Christine is a Senior Program Manager, Microsoft Azure.
A generalized VM Image contains an OS disk, which, as the name suggests, has been generalized (for Windows, you have run Sysprep and for Linux, you have executed ‘waagent –deprovision’) and needs to be provisioned during deployment time. OS Images today are generalized. This type of VM Image is meant to be used as a “model” to quickly stamp out similar virtual machines, such as scaling out a front-end to your application in production or spinning up and tearing down similar development and test environments quickly.
A specialized VM Image contains an OS disk, which is already provisioned. It is similar to a disk today in that it is “ready-to-use”, but unlike a disk, the VHDs of a VM Image are treated as read-only and copied when deploying a new virtual machine. A specialized VM Image is meant to be used as a “snapshot” to deploy a VM to a good known point in time, such as checkpointing a developer machine, before performing a task which may go wrong and render the virtual machine useless. It is not meant to be a mechanism to clone multiple identical virtual machines in the same virtual network due to the Windows requirement of Sysprep for image replication.
Prepare your virtual machine
Now that your VM is ready and customized the way you want, you are ready to transform it as a VM image. To do so, you need a tool called sysprep. Be sure to be logged in your Windows Server VM on Azure, open a PowerShell window and execute the following :
& "$Env:SystemRoot\system32\sysprep\sysprep.exe" /generalize /oobe /shutdown

You will see a dialog telling you that Sysprep is working, it will take at least 2-3 minutes.
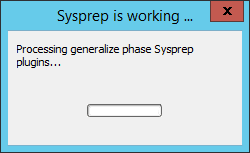
The /shutdown parameter will shutdown the VM when sysprep is done generalizing the VM.
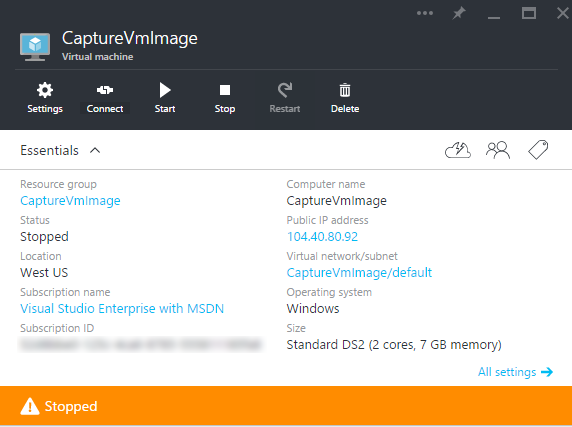
Allow a minute or two so that you can see that your VM status is really marked as stopped in the portal.
Capture the image
Now you have the choice of two tools... Neither is really harder than the other, it is really a question of personal preferences.
- Capture VM image with ARM Explorer
- Capture VM image with PowerShell v1.0.x (Preferred for PowerShell capture)
- Capture VM image with PowerShell v0.9.x
Capture is done, what's next?
There is a bug in the actual implementation of the capture call. Whatever you specify in the DestinationContainerName it will save the image under a container named System in the storage account with a blob path containing the name you specified as the container name.
This is an example of what you can expect as full path (yours will be a bit different depending on the parameter values you entered):
https://vmcapturedemo.blob.core.windows.net/system/Microsoft.Compute/Images/mytemplates/template-osDisk.c2a2a4e3-a2cb-44f1-9d55-921dfa29b314.vhd
If everything went well during the capture phase you'll have 2 new files in your storage account, a VHD file and an ARM template that was generated for you. This template is not usable as-is except if you already have a NIC that you can use, but you have all the information in it as to how to declare a virtual machine to use your custom VM image. Here is the storageProfile node from the file that was created for me:
"storageProfile": {
  "osDisk": {
    "osType": "Windows",
    "name": "template-osDisk.c2a2a4e3-a2cb-44f1-9d55-921dfa29b314.vhd",
    "createOption": "FromImage",
    "image": {
      "uri": "https://vmcapturedemo.blob.core.windows.net/system/Microsoft.Compute/Images/mytemplates/template-osDisk.c2a2a4e3-a2cb-44f1-9d55-921dfa29b314.vhd"
    },
    "vhd": {
      "uri": "http://vmcapturedemo.blob.core.windows.net/vmcontainere14af8ec-3022-4fda-9a8f-dcc13ba5bdc0/osDisk.e14af8ec-3022-4fda-9a8f-dcc13ba5bdc0.vhd"
    },
    "caching": "ReadWrite"
  }
}
You now have an generalized VM image from which you can create as many virtual machines as you want.
What's next?
Want to create a new VM from the image you just captured?
- See How to create a virtual machine from a custom image using ARM and Azure PowerShell v1.0.x (Preferred for PowerShell)
- See How to create a virtual machine from a custom image using ARM and Azure PowerShell v0.9.x
- See How to create a virtual machine from a custom image using ARM Template
Resources
- ARM Explorer
- Microsoft Azure PowerShell (latest release)
- Create a virtual machine running Windows in the Azure portal